
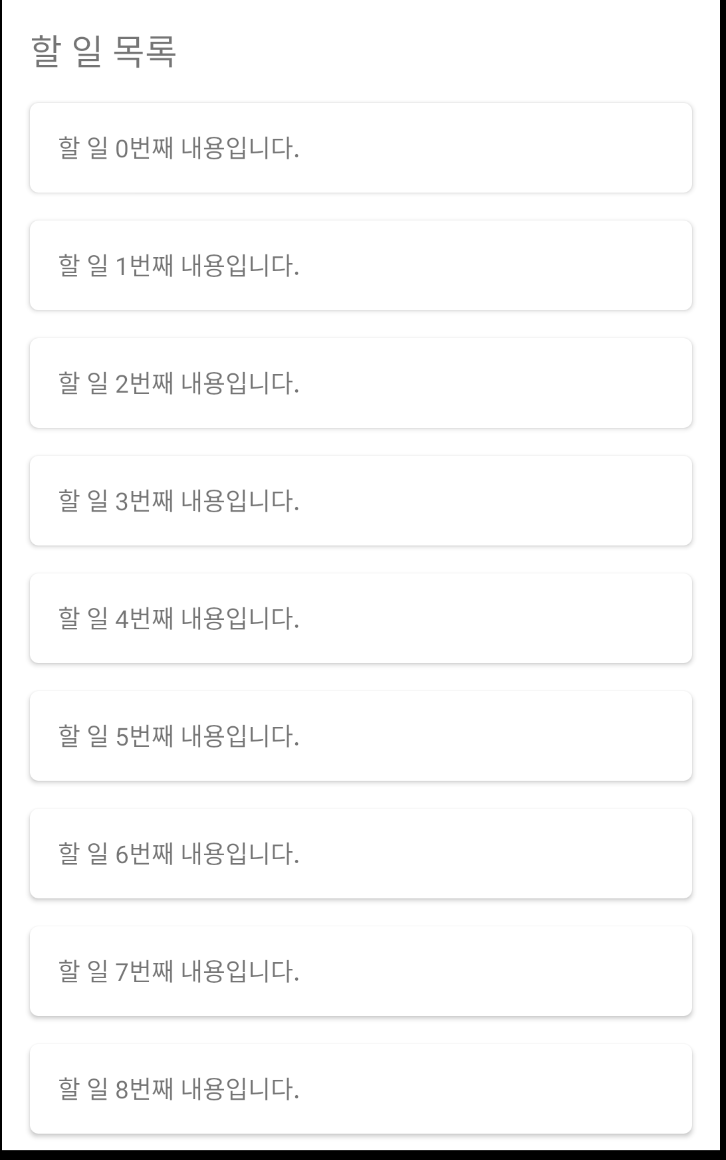
#1 RecyclerView 구현
- model class
data class Todo(
    val id: Int,
    val text: String
)
- item layout
<?xml version="1.0" encoding="utf-8"?>
<com.google.android.material.card.MaterialCardView xmlns:android="http://schemas.android.com/apk/res/android"
    xmlns:app="http://schemas.android.com/apk/res-auto"
    xmlns:tools="http://schemas.android.com/tools"
    android:layout_width="match_parent"
    android:layout_height="wrap_content"
    android:layout_marginStart="16dp"
    android:layout_marginEnd="16dp"
    android:layout_marginBottom="16dp"
    app:cardCornerRadius="5dp"
    app:cardElevation="2dp">

    <androidx.constraintlayout.widget.ConstraintLayout
        android:layout_width="match_parent"
        android:layout_height="wrap_content"
        android:padding="16dp">

        <TextView
            android:id="@+id/todo_text"
            android:layout_width="wrap_content"
            android:layout_height="wrap_content"
            app:layout_constraintStart_toStartOf="parent"
            app:layout_constraintTop_toTopOf="parent"
            tools:text="할 일 내용이 들어갑니다." />
    </androidx.constraintlayout.widget.ConstraintLayout>

</com.google.android.material.card.MaterialCardView>
- ViewHolder
class TodoViewHolder(binding: ItemTodoBinding): RecyclerView.ViewHolder(binding.root) {

    private val todoText = binding.todoText


    fun bind(item: Todo) {
        todoText.text = item.text
    }
}
- Adapter
class TodoDataAdapter : RecyclerView.Adapter<TodoViewHolder>() {

    private var todoList = ArrayList<Todo>()

    override fun onCreateViewHolder(parent: ViewGroup, viewType: Int): TodoViewHolder {
        return TodoViewHolder(
            ItemTodoBinding.inflate(
                LayoutInflater.from(parent.context),
                parent,
                false
            )
        )
    }

    override fun onBindViewHolder(holder: TodoViewHolder, position: Int) {
        holder.bind(todoList[position])
    }

    override fun getItemCount(): Int {
        return this.todoList.size
    }


    @SuppressLint("NotifyDataSetChanged")
    fun setData(items: ArrayList<Todo>) {
        this.todoList = items
        notifyDataSetChanged()
    }
}
- activity layout.xml
<?xml version="1.0" encoding="utf-8"?>
<androidx.constraintlayout.widget.ConstraintLayout xmlns:android="http://schemas.android.com/apk/res/android"
    xmlns:app="http://schemas.android.com/apk/res-auto"
    xmlns:tools="http://schemas.android.com/tools"
    android:layout_width="match_parent"
    android:layout_height="match_parent"
    tools:context=".MainActivity">

    <TextView
        android:id="@+id/pageTitle"
        android:layout_width="wrap_content"
        android:layout_height="wrap_content"
        android:layout_marginStart="16dp"
        android:layout_marginTop="16dp"
        android:text="할 일 목록"
        android:textSize="20sp"
        app:layout_constraintLeft_toLeftOf="parent"
        app:layout_constraintTop_toTopOf="parent" />

    <androidx.recyclerview.widget.RecyclerView
        android:id="@+id/recyclerview_todo"
        android:layout_width="0dp"
        android:layout_height="0dp"
        android:background="@color/white"
        android:clipToPadding="false"
        android:paddingTop="16dp"
        android:scrollbarStyle="outsideOverlay"
        android:scrollbars="vertical"
        app:layout_constraintBottom_toBottomOf="parent"
        app:layout_constraintEnd_toEndOf="parent"
        app:layout_constraintStart_toStartOf="parent"
        app:layout_constraintTop_toBottomOf="@id/pageTitle" />

</androidx.constraintlayout.widget.ConstraintLayout>
- MainActivity.kt
class MainActivity : AppCompatActivity() {
    private lateinit var binding: ActivityMainBinding


    private lateinit var todoDataAdapter: TodoDataAdapter
    private val todoList = ArrayList<Todo>()


    override fun onCreate(savedInstanceState: Bundle?) {
        super.onCreate(savedInstanceState)
        binding = ActivityMainBinding.inflate(layoutInflater)
        setContentView(binding.root)


        // set up recyclerview adapter
        todoDataAdapter = TodoDataAdapter()

        // set up recyclerview
        binding.recyclerviewTodo.apply {
            setHasFixedSize(true)
            layoutManager =
                LinearLayoutManager(this@MainActivity, LinearLayoutManager.VERTICAL, false)
            adapter = todoDataAdapter
        }


        // set data to recyclerview
        for (i in 0..13) {
            val todo = Todo(id = i, text = "할 일 ${i}번째 내용입니다.")
            todoList.add(todo)
        }
        todoDataAdapter.setData(items = todoList)
    }
}
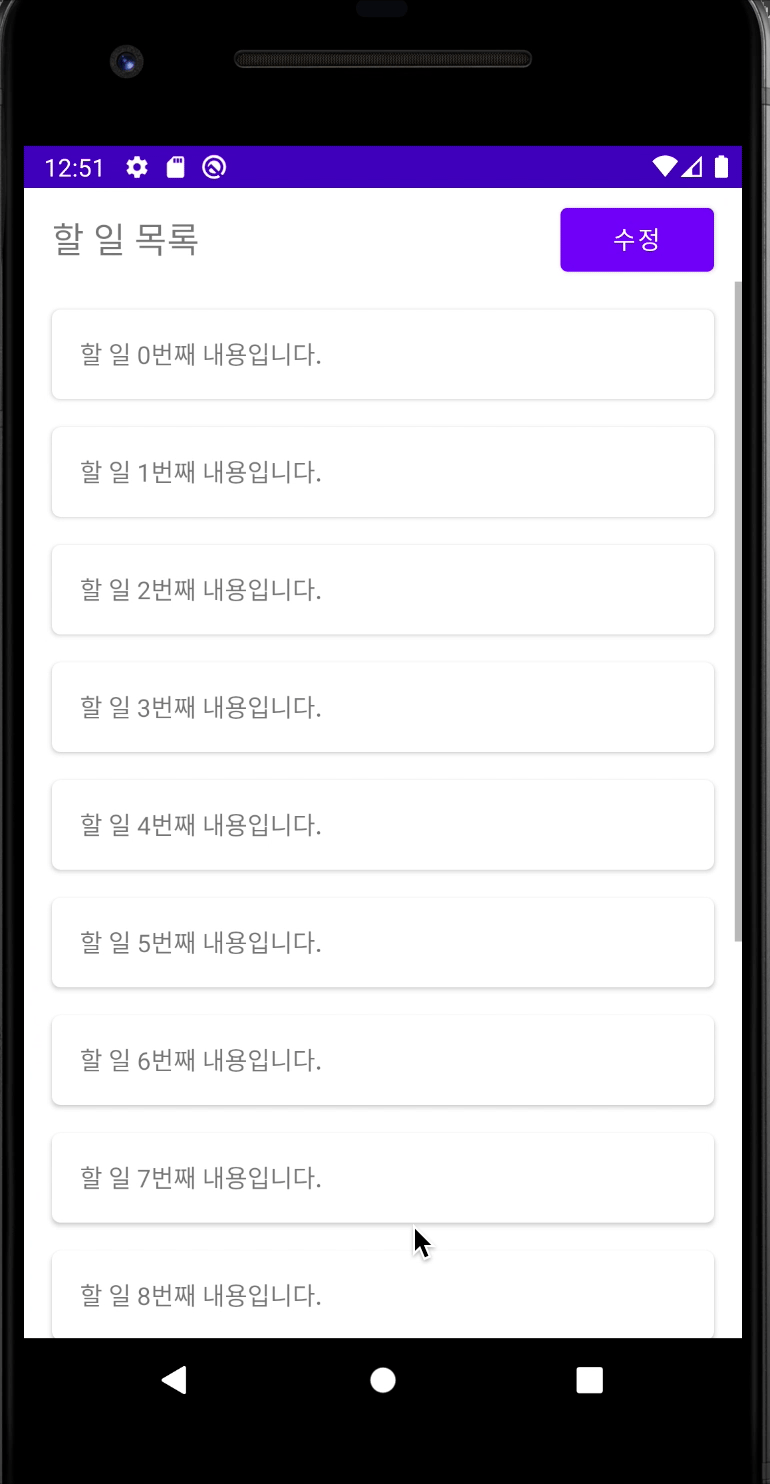
#2 일반모드/수정모드 토글버튼 만들기
모드를 변경할 수 있는 버튼을 하나 추가하고
<Button
        android:id="@+id/btn_change_mode"
        android:layout_width="wrap_content"
        android:layout_height="wrap_content"
        android:layout_marginEnd="16dp"
        app:layout_constraintBottom_toBottomOf="@id/pageTitle"
        app:layout_constraintEnd_toEndOf="parent"
        app:layout_constraintTop_toTopOf="@id/pageTitle"
        tools:text="수정" />
ViewModel을 사용하여 현재 모드를 저장하고 (Int로 저장), 해당 값을 observe 하여 현재 모드에 따라 버튼 텍스트를 다르게 보여주자!
class TodoViewModel : ViewModel() {

    private var _mode = MutableLiveData<Int>()
    val mode get() = _mode // 0: 일반, 1: 수정

    init {
        _mode.value = 0 // 기본은 일반모드
    }

    fun setMode(mode: Int) {
        _mode.value = mode
    }
}
// by viewmodels() 사용을 위해 gradle에 추가
def activity_version = "1.3.1"
implementation "androidx.activity:activity-ktx:$activity_version"
class MainActivity : AppCompatActivity() {
...
private val todoViewModel: TodoViewModel by viewModels()
...
override fun onCreate(savedInstanceState: Bundle?) {
super.onCreate(savedInstanceState)
binding = ActivityMainBinding.inflate(layoutInflater)
setContentView(binding.root)
...
// button click listener
binding.btnChangeMode.setOnClickListener {
if (todoViewModel.mode.value == 0) {
todoViewModel.setMode(mode = 1)
} else {
todoViewModel.setMode(mode = 0)
}
}
// observe current mode
todoViewModel.mode.observe(this, {
if (it == 0) {
// 일반모드
binding.btnChangeMode.text = getString(R.string.edit) // 수정으로 표시
} else {
// 수정모드
binding.btnChangeMode.text = getString(R.string.complete) // 완료로 표시
}
})
}
}
#3 모드에 따라 다른 RecyclerView Item 보여주기
이제 현재 모드에 따라 다른 뷰를 보여주자
먼저 모델 클래스에 멤버변수 viewType, isChecked 추가
data class Todo(
    val id: Int,
    val text: String,
    var viewType: Int,
    var isChecked: Boolean
)
viewtype으로 사용할 상수 선언
object TodoViewType {
    const val DEFAULT = 0
    const val EDIT = 1
}
edit mode 아이템 레이아웃, ViewHolder 만들기
<?xml version="1.0" encoding="utf-8"?>
<com.google.android.material.card.MaterialCardView xmlns:android="http://schemas.android.com/apk/res/android"
    xmlns:app="http://schemas.android.com/apk/res-auto"
    xmlns:tools="http://schemas.android.com/tools"
    android:layout_width="match_parent"
    android:layout_height="wrap_content"
    android:layout_marginStart="16dp"
    android:layout_marginEnd="16dp"
    android:layout_marginBottom="16dp"
    app:cardCornerRadius="5dp"
    app:cardElevation="2dp">

    <androidx.constraintlayout.widget.ConstraintLayout
        android:layout_width="match_parent"
        android:layout_height="wrap_content"
        android:padding="16dp">

        <TextView
            android:id="@+id/todo_text"
            android:layout_width="wrap_content"
            android:layout_height="wrap_content"
            app:layout_constraintStart_toStartOf="parent"
            app:layout_constraintTop_toTopOf="parent"
            tools:text="할 일 내용이 들어갑니다." />

        <CheckBox
            android:id="@+id/checkbox"
            android:layout_width="wrap_content"
            android:layout_height="wrap_content"
            android:clickable="false"
            android:minWidth="0dp"
            android:minHeight="0dp"
            app:layout_constraintBottom_toBottomOf="parent"
            app:layout_constraintEnd_toEndOf="parent"
            app:layout_constraintTop_toTopOf="parent" />
    </androidx.constraintlayout.widget.ConstraintLayout>

</com.google.android.material.card.MaterialCardView>
class TodoEditViewHolder(binding: ItemTodoEditBinding): RecyclerView.ViewHolder(binding.root) {

    private val todoText = binding.todoText
    private val checkbox = binding.checkbox


    fun bind(item: Todo) {
        todoText.text = item.text
        checkbox.isChecked = item.isChecked
    }
}
adapter 수정
class TodoDataAdapter : RecyclerView.Adapter<RecyclerView.ViewHolder>() {

    private var todoList = ArrayList<Todo>()

    override fun onCreateViewHolder(parent: ViewGroup, viewType: Int): RecyclerView.ViewHolder {
        when (viewType) {
            TodoViewType.EDIT -> {
                return TodoEditViewHolder(
                    ItemTodoEditBinding.inflate(
                        LayoutInflater.from(parent.context),
                        parent,
                        false
                    )
                )
            }
            else -> {
                return TodoViewHolder(
                    ItemTodoBinding.inflate(
                        LayoutInflater.from(parent.context),
                        parent,
                        false
                    )
                )
            }
        }
    }

    override fun onBindViewHolder(holder: RecyclerView.ViewHolder, position: Int) {
        when (todoList[position].viewType) {
            TodoViewType.EDIT -> {
                (holder as TodoEditViewHolder).bind(todoList[position])
            }
            else -> {
                (holder as TodoViewHolder).bind(todoList[position])
            }
        }
    }

    override fun getItemCount(): Int {
        return this.todoList.size
    }

    override fun getItemViewType(position: Int): Int {
        return todoList[position].viewType // 직접 설정한 뷰타입으로 설정되게 만든다.
    }


    @SuppressLint("NotifyDataSetChanged")
    fun setData(items: ArrayList<Todo>) {
        this.todoList = items
        notifyDataSetChanged()
    }

    @SuppressLint("NotifyDataSetChanged")
    fun setViewType(currentMode: Int) { // 여러 곳에서 쓰는 mode는 상수로 묶어줘도 좋을 듯!
        val newTodoList = ArrayList<Todo>()
        for (i in 0 until todoList.size) {
            if (currentMode == 0) {
                // 일반모드
                todoList[i].viewType = TodoViewType.DEFAULT
            } else {
                // 수정모드
                todoList[i].viewType = TodoViewType.EDIT
            }
            newTodoList.add(todoList[i])
        }

        this.todoList = newTodoList
        notifyDataSetChanged()
    }
}
마지막으로~ mainActivity 수정
class MainActivity : AppCompatActivity() {

    ...

    override fun onCreate(savedInstanceState: Bundle?) {
        ...

        // set data to recyclerview
        for (i in 0..13) {
            val todo = Todo(
                id = i,
                text = "할 일 ${i}번째 내용입니다.",
                viewType = TodoViewType.DEFAULT,
                isChecked = false
            )
            todoList.add(todo)
        }
        todoDataAdapter.setData(items = todoList)


        ...


        // observe current mode
        todoViewModel.mode.observe(this, {
            ...

            // 모든 데이터의 viewType 바꿔주기
            todoDataAdapter.setViewType(currentMode = it)
        })
    }
}
#4 수정모드일 때, 선택된 position 삭제하기
우선 아이템이 클릭되었을 때 isChecked가 바뀌고 체크 버튼도 바뀌도록 해보자.
뷰홀더에서 클릭한 신호를 받을 수 있도록 click listener를 만든다.
interface ItemClickListener {
    fun onClickedItem(position: Int)
}
그리고 뷰홀더에 리스너를 장착해주고
class TodoEditViewHolder(
    binding: ItemTodoEditBinding,
    private val itemClickListener: ItemClickListener
) : RecyclerView.ViewHolder(binding.root) {

    ...

    init {
        itemView.setOnClickListener {
            itemClickListener.onClickedItem(position = adapterPosition)
        }
    }


    ...
}
어댑터 수정
class TodoDataAdapter(private val itemClickListener: ItemClickListener) : RecyclerView.Adapter<RecyclerView.ViewHolder>() {

    private var todoList = ArrayList<Todo>()

    override fun onCreateViewHolder(parent: ViewGroup, viewType: Int): RecyclerView.ViewHolder {
        when (viewType) {
            TodoViewType.EDIT -> {
                return TodoEditViewHolder(
                    ItemTodoEditBinding.inflate(
                        LayoutInflater.from(parent.context),
                        parent,
                        false
                    ), itemClickListener = itemClickListener
                )
            }
            else -> {
                return TodoViewHolder(
                    ItemTodoBinding.inflate(
                        LayoutInflater.from(parent.context),
                        parent,
                        false
                    )
                )
            }
        }
    }

    ...

    fun setChecked(position: Int) {
        todoList[position].isChecked = !todoList[position].isChecked
        notifyItemChanged(position)
    }
}
그리고 MainActivity에도 리스너를 장착해준다.
package com.example.recyclerviewwitheditmode

import androidx.appcompat.app.AppCompatActivity
import android.os.Bundle
import androidx.activity.viewModels
import androidx.recyclerview.widget.LinearLayoutManager
import com.example.recyclerviewwitheditmode.databinding.ActivityMainBinding

class MainActivity : AppCompatActivity() {

    ...

    override fun onCreate(savedInstanceState: Bundle?) {
        super.onCreate(savedInstanceState)
        binding = ActivityMainBinding.inflate(layoutInflater)
        setContentView(binding.root)


        // set up recyclerview adapter
        todoDataAdapter = TodoDataAdapter(object : ItemClickListener {
            override fun onClickedItem(position: Int) {
                todoDataAdapter.setChecked(position)
            }
        })

        ...
    }
}
여기까지 만들고 빌드해보면, 클릭한 아이템의 CheckBox가 토글버튼처럼 작동한다.
마지막으로 수정모드 상태로 "완료" 버튼을 누르면
체크했던 아이템들이 삭제되도록 구현해보자.
adapter에 method 추가
@SuppressLint("NotifyDataSetChanged")
    fun removeCheckedItems() {
        // 어떤 방법으로 notify를 해야하는지 모르겠다... DiffUtil에 대해 알아볼 때가 된 것 같다.

        // check 해제 된 아이템만 걸러서 보여준다.
        val newTodoList = todoList.filter { todo -> !todo.isChecked }
        todoList = newTodoList as ArrayList<Todo>
        notifyDataSetChanged()
    }
MainActivity 수정
// button click listener
        binding.btnChangeMode.setOnClickListener {
            if (todoViewModel.mode.value == 0) {
                ...
            } else {
                // 현재 수정모드 > 일반모드로 변경
                todoDataAdapter.removeCheckedItems()
                todoViewModel.setMode(mode = 0)
            }
        }
#5 결과
끝!
'개발 > 안드로이드 (Android)' 카테고리의 다른 글
| [Android/Kotlin] RecyclerView ViewType을 지정하여 서로 다른 View 보여주기 (채팅 레이아웃) (0) | 2024.06.30 |
|---|---|
| [Android/Kotlin] ViewPager2 Transformer (2) | 2024.06.30 |
| [Android/Kotlin] display 크기 구하기 (0) | 2024.06.30 |
| [Android] 뷰의 크기 (width, height) 구하기, 동적으로 크기 설정하기 (0) | 2023.02.07 |
| [Android] productFlavors 별로 google-services.json 설정하기 (0) | 2023.02.07 |